Tuesday 17 April 2012

Intention

In this post, I decided to go with the intention to kill as my theme.
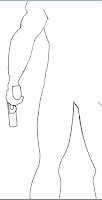
I started off thinking of a way to give it a cool angle. So I decided on making it so the camera is on the main characters legs. I started off with just the outline.
After I made the outline, I started colouring the character, and added some shadows to it.
After the shadow, I added a background to the canvas with a gradient to it. I choose purple because it will complement and give red colour some pop. 
I also added bevel and emboss effect to the character. Instead of having the default black and white, I changed the colour to yellow and orange and changed the mode.
This itself gave a nice effect to the character. After that I created a bad guy in a silhouette form.
And finally, I added a ground for them to stand on so that they are not hovering in mid air.
There you have it, Intention. So here it is the final piece.
INTENTION


Capable


Illustration by René Gruau
In this illustration René Gruau shows a fashion side of illustration but this image gives me an idea of what I can do.
This image reminded me of the good and evil side of humans. In my illustration, I want to portray an emotion. I started off with a gradient canvas on photoshop and just started drawing with the tabloid. 


I think that this image shows good composition and has a sense of balance to it. The image is not ment to have a lot of colours to emphasize the evilness with colours red and black. This image uses a good use of third rule keeping the focus on the first half of the image. Then with the help of using lines in between image, the eye follows down the page, where it meets the caption of the image.

Fluid

Illustrated by CG Evers


This image has a very good illustration of fluids, which is why I chose this image. CG Evers work posted on Leifs blog have some sorts of water form incorporated in his images. The illustration of water is done in detail which inspires me to create something realistic.

For this tutorial I have gone ahead and take an image of a glass with water in a studio and with the help of photoshop, made a path tool around the glass to have a cut out.
To help with my final design, I got help from this link: 
http://www.youtube.com/watch?v=UioEstpPy0Q 
It uses 3d tool so make sure you have a fast running computer.
Using similar techniques, I created water effect on top of the text "water."
And this is the result.


Friday 13 April 2012

Suspense

This week i have decided to go with the artist Ric Grasso


Tutorial: for cs4- cs5 extended or higher

with the background layer go to 3d menu and go to new shape from layer and to go sphere.
It will give you a nice round ball.
 in the 3d layer double click the background layer to build elements to it.
create new blank layer.
Press d for black and white
fill the colour to 50% grey. (Shift + Del)
filter -> Render -> fibers
variations - 16
strength - 12

Go to filter again go to distort and choose polar coordinates.
choose rectangular to polar and press ok.
Select marque opt. +  Shift from the centre of to the edge of the circle. and press command j to bring it to its own layer
and lock the transparency by clicking on the first button next to lock in layers panel.
go to filter -> blur and -> radial blur. zoom it at 30%
go to gradient, radial gradient to be specific to a black to transparency and change the mode to opacity.
start by getting some gradient from the middle so it looks like an iris of the eye. Click it couple of times so you have a good amount.
click the layer and convert it to smart object. and scale it down by clicking shift + option.
Next bring in some colour by clicking on layer style and click inner glow and change it to linear burn mode with a black colour.
click on colour overlay and choose the colour of your choice and change the mode to soft light. click ok and SAVE the changes.
you can close it down.
you will see that the eye is not fitting properly, the easy way to fix that is to double click the background and transform it so its squished from sides. 
Adjust the eye according to your preferences chosen.

you can rotate the eye around by clicking the 3d rotate tool.
go to 3d window and click 3d.
click on the materials section 3rd one one from the top.
click on the icon next to it and choose new texture. set it to the dimensions from original file.
you can see the light added in.
choose the gloss at 75% and shine at around 60%.